
 By Jackson
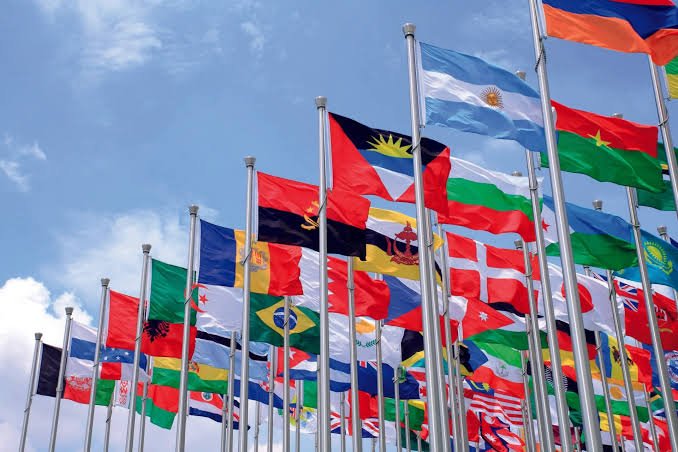
When you invest in custom promotional banners or organizational flags, the final product’s visual appeal relies heavily on the quality of your initial file setup. Professional flag printing is a specialized discipline that blends graphic design principles with textile manufacturing realities. Unlike standard paper printing, flags move, ripple in the wind, and feature specialized fabrics that absorb ink in unique ways. Ensuring your artwork looks vibrant, sharp, and professional requires meticulous preparation from the moment you open your design software.
Understanding the Flag Printing Process
Before diving into pixels, vector points, and color swatches, it helps to understand how modern flag printing works. Knowing the mechanics behind the production line empowers you to make smarter technical choices during the design phase.
Dye-Sublimation vs. Screen Printing
The vast majority of modern custom flags are produced using dye-sublimation printing. In this process, heat transfers special ink directly into the pores of the fabric rather than sitting on top of the material like a plastic film. This results in vibrant colors that permeate the fibers, making the flag weather-resistant, washable, and durable. For large runs with limited colors, traditional screen printing might still be used, but dye-sublimation dominates modern flag printing due to its ability to handle full-color photographic imagery and complex gradients with ease.
Choosing the Right Fabric for Your Flag Printing Project
The choice of fabric dictates how your artwork will ultimately look. Knitted polyester is the industry standard because it allows ink to bleed through to the back side cleanly while remaining durable enough to withstand outdoor elements. Mesh polyester features tiny perforations that reduce wind resistance, helping the flag last longer in high-wind environments. When preparing your artwork, keep your chosen fabric in mind; fine details can sometimes get lost in textured or meshed materials, meaning you may need to scale up text and bolden critical lines.
Setting Up Your Design Software Correctly
A successful flag printing project starts with a properly configured canvas. Setting up your document correctly from the start prevents frustrating scaling issues, pixelation, and color shifts down the road.
Color Modes: CMYK vs. Pantone
One of the most common pitfalls in flag printing is managing color expectations. Computer monitors display images using RGB light, while printing presses use CMYK inks or specialized Pantone Matching System (PMS) spot colors. Always set your working document to CMYK color mode before you begin designing. If your brand guidelines require exact color matching, specify Pantone spot colors in your vector files. Keep in mind that because dye-sublimation ink infuses into fabric, colors can sometimes appear slightly softer or more saturated on the reverse side of a single-reverse flag.
Resolution and Image Quality for Flag Printing
Because flags are viewed from a distance, they do not always require the ultra-high resolutions needed for glossy business cards or fine art photography. However, low-resolution raster images will still result in blurry, pixelated graphics that look unprofessional. For standard flag printing, aim for a resolution of 150 dots per inch (DPI) at full scale, or 300 DPI if you are scaling down your canvas proportionally (such as working at 50 percent scale for a massive banner). Always use vector graphics wherever possible to ensure crisp edges at any distance.
Bleed, Margins, and Safe Zones
Just like paper printing, flag printing requires proper bleed and safety margins. Because finishing techniques like hem stitching and pole pocket welding consume a small margin of the outer edges, you must keep critical elements like text, logos, and important icons well inside the safety zone—typically at least two inches away from the trim edge. Conversely, background colors and patterns should extend past the cut line into the bleed area to ensure that no white edges appear if the sewing machine shifts slightly during finishing.
Vector Graphics vs. Raster Images
Understanding the difference between vector files and raster images is critical for achieving professional results in flag printing.
Why Vectors Reign Supreme in Flag Printing
Vector graphics, created in programs like Adobe Illustrator or CorelDRAW, use mathematical formulas to define lines, curves, and shapes. This means you can scale a vector logo from the size of a postage stamp to the size of a billboard without losing an ounce of quality. For flag printing, logos, typography, and geometric shapes must always be supplied as vectors. This guarantees razor-sharp lettering that can be read clearly from dozens of feet away, even when the flag is fluttering in a strong breeze.
Managing Raster Images and Upscaling Safely
Raster images (such as JPEGs, PNGs, and TIFFs) are made of a grid of individual pixels. If you take a small, low-resolution JPEG downloaded from a website and stretch it across a large flag template, the pixels will expand and look blocky. If your design includes photographic elements, ensure the source photo is high resolution. Avoid the temptation to artificially upsample low-resolution images using basic software scaling, as this introduces artifacts and blurriness that become painfully obvious on large-format prints.
Double-Sided Flags and Transparency Handling
Flags are unique because they are often viewed from both the front and the back. How your artwork behaves on the reverse side is a critical design consideration.
Designing for Single-Reverse vs. Double-Sided Flag Printing
In standard single-reverse flag printing, ink bleeds through the fabric to the back side, resulting in a mirror image where the design is reversed and slightly lighter on the back (typically around eighty to ninety percent opacity bleed-through). If your flag features text, a standard single-reverse flag will read backwards on the reverse side. To ensure text reads correctly from both sides, you must opt for a true double-sided flag. True double-sided flags consist of three layers: two separate printed flag pieces with an opaque, light-blocking liner sewn in the middle. If you choose a double-sided flag, your artwork file must include separate, perfectly aligned artboards for both the front and back sides.
Avoiding Transparency Pitfalls
When exporting files for flag printing, watch out for unintended transparency effects, drop shadows, and complex blending modes. These effects can sometimes cause unexpected artifacts or color shifts when processed by a RIP (Raster Image Processor) software at the print shop. Flattening transparent elements or converting complex effects into solid raster layers before export can save you from costly production delays.
Final Pre-Flight Checklist Before Submission
Before you upload your final artwork file to your print provider, run through a quick pre-flight checklist to ensure everything is error-free.
Converting Fonts to Outlines
Missing fonts are the number one cause of delays in custom printing. If your design contains custom typography and you send the native file, the printer’s computer may substitute your font with a default system font if they do not have your specific typeface installed. To prevent this, convert all text to outlines, curves, or shapes before exporting. This turns your letters into vector graphics, locking the typography in place so it renders identically on any machine.
Exporting to High-Resolution PDF Formats
The industry standard file format for professional printing is a high-resolution, print-ready PDF (preferably PDF/X-1a or PDF/X-4 standards). Make sure your PDF includes crop marks, sufficient bleed, and embeds all linked raster images at maximum quality. Double-check your dimensions one last time to ensure the aspect ratio matches the specific flag size you ordered. Taking these extra few minutes to verify your artwork will guarantee a smooth production process, resulting in stunning, professional flags that elevate your brand and catch every eye.